AWS Lambda에 코드를 업로드할때 numpy, pandas와 같이 C 또는 C++을 기반으로 한 라이브러리가 포함되어 있다면 Lambda는 이 라이브러리를 Import하지 못합니다.
⚠️ pandas 라이브러리 설치시에는 NumPy가 같이 설치됩니다.
Please note and check the following:

  * The Python version is: Python3.9 from "/var/lang/bin/python3.9"
  * The NumPy version is: "1.23.4"

and make sure that they are the versions you expect.
Please carefully study the documentation linked above for further help.

Original error was: No module named 'numpy.core._multiarray_umath'

Unable to import required dependencies:\nnumpy: \n\nIMPORTANT: PLEASE READ THIS FOR ADVICE ON HOW TO SOLVE THIS ISSUE!\n\nImporting the numpy C-extensions failed. This error can happen for\nmany reasons, often due to issues with your setup or how NumPy was\ninstalled.\n\nWe have compiled some common reasons and troubleshooting tips at:\n\n    https://numpy.org/devdocs/user/troubleshooting-importerror.html\n\nPlease note and check the following:\n\n  * The Python version is: Python3.9 from \"/var/lang/bin/python3.9\"\n  * The NumPy version is: \"1.23.4\"\n\nand make sure that they are the versions you expect.\nPlease carefully study the documentation linked above for further help.\n\nOriginal error was: No module named 'numpy.core._multiarray_umath'\n",
따라서 Lambda Layer에 네이티브 코드 라이브러리가 포함되어 있는 경우 바이너리가 Amazon Linux와 호환되는 시스템을 사용하여 이러한 라이브러리를 컴파일하고 빌드해야 합니다.
pip를 활용하여 라이브러리를 mac에서 패키지를 다운로드 받아보면 다음과 같이 mac os기반의 패키지를 받는 것을 확인 할 수 있습니다.
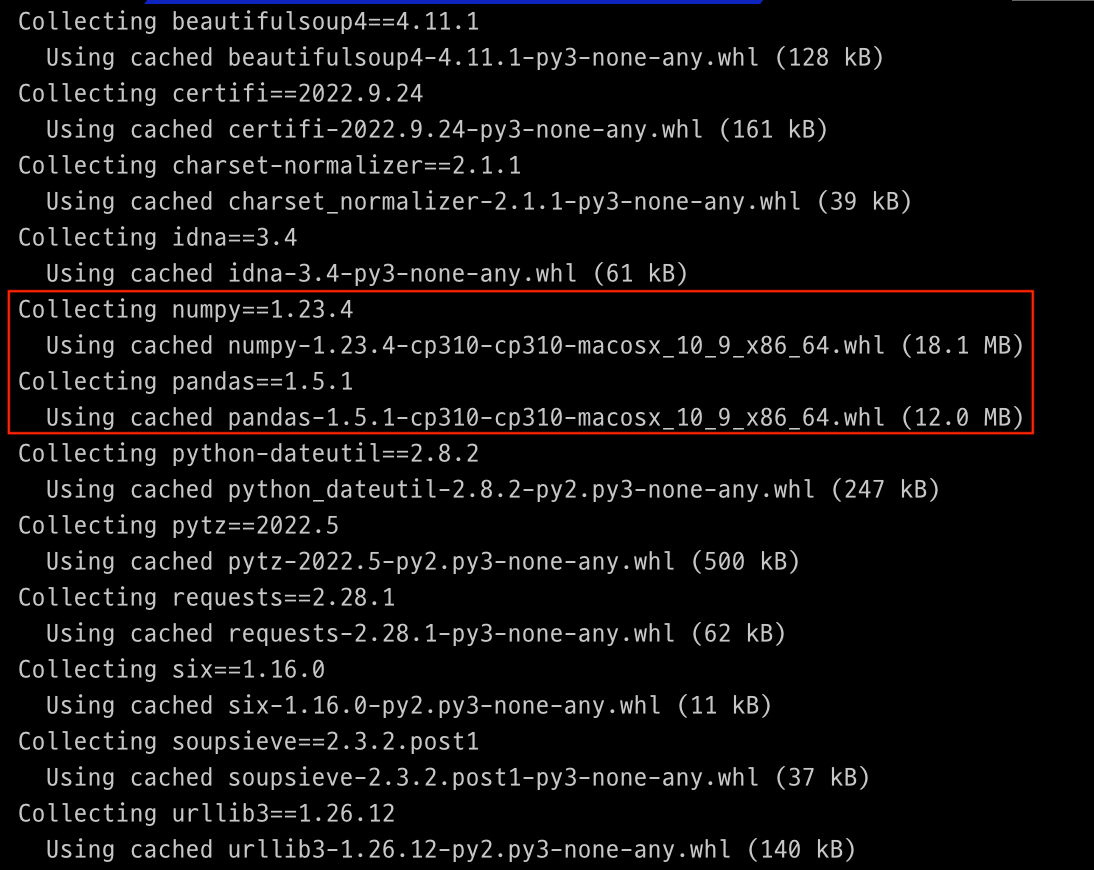
모든 패키지가 위와같은 문제가 발생하는 것은 아니지만, 가능하면 OS 호환성을 고려하여 패키지를 설치하는 것이 좋습니다.
이러한 문제를 해결하기 위해 AWS EC2에서 Amazon Linux 인스턴스를 할용할 수 있지만, Docker를 활용하여 간단하게 Lambda Layer 패키지를 만들 수 있습니다.
1. Docker 설치하기
먼저 Docker 가 설치되어 있지 않다면, 아래 링크를 참고하여 Docker를 설치합니다.
Docker 설치하기
2. Amazone Linux2 컨테이너 실행하기
Amazone Linux2 실행합니다. docker images로 image가 없으면 해당 iamge를 pull 한 후 실행됩니다.
docker run -it amazonlinux:latest-it 옵션은 컨테이너를 종료하지 않은채로 터미널 작업을 하기 위해서 사용합니다.
cat /etc/os-release를 입력하여 결과를 확인합니다.
#결과
NAME="Amazon Linux"
VERSION="2"
ID="amzn"
ID_LIKE="centos rhel fedora"
VERSION_ID="2"
PRETTY_NAME="Amazon Linux 2"
ANSI_COLOR="0;33"
CPE_NAME="cpe:2.3:o:amazon:amazon_linux:2"
HOME_URL="https://amazonlinux.com/"
Python 3.9, 3.8 은 Amazon Linux 2 런타임 환경만을 지원합니다.
Lambda 런타임 확인하기 ➔
3. 컨테이너에 파이썬 설치하기
3.1 필수 라이브러리 설치
먼저 파이썬 설치를 위해 GCC 컴파일러와 같은 필수 개발라이브러리를 먼저 설치 합니다.
yum -y groupinstall "Development Tools"
yum install -y openssl-devel bzip2-devel libffi-devel
yum install -y wget
3.2 Python 3.9 설치하기
파이썬 3.9 다운로드 페이지로 이동하여 파이썬 3.9를 설치합니다.
cd /home
# Download python 3.9
wget https://www.python.org/ftp/python/3.9.15/Python-3.9.15.tgz

# 압축풀기
tar xzf Python-3.9.15.tgz

# python 빌드 및 설치
cd Python-3.9.15
./configure --enable-optimizations
make altinstall
make altinstall 기본 파이썬 바이너리 파일위치 /usr/bin/python 교체를 방지하는 데 사용됩니다.
3.3 Python 버전 확인
설치된 Python 3.9는 /usr/local/bin 디렉토리에 설치됩니다. 기본 Python 버전을 덮어쓰지 않았으므로 설치된 버전 확인을 위해서 다음과 같이 실행해야 합니다.
파이썬이 제대로 설치되었는지 버전을 확인합니다.
python3.9 -V

# 결과
Python 3.9.15
3.4 파이썬 가상환경 생성하
애플리케이션 패키지가 포함시킬 수 있는 env라는 가상환경을 생성합하고 실행합니다.
python3.9 -m venv env
source env/bin/activate

# 결과
(env) bash-4.2#
Amazon Linux2 기반의 파이썬 3.9 개발환경 구성이 완료되었습니다. 이제 lambda layer 패키지를 생성하겠습니다.
4. AWS Lambda Layer 패키지 생성하기
requirement.txt를 갖고 전체 패키지 파일을 생성할 수 있지만 패키지 설치방식은 모두 동일 하므로 여기서는 Numpy 패키지를 가지고 Layer를 생성해보겠습니다.
4.1 Numpy 패키지 다운로드
pip로 numpy 패키지를 다운로드 하게 되면, 로컬 터미널 환경에 맞는 패키지를 다운로드 받게 됩니다. 따라서 Amazon Linux용으로 패키지를 다운로드 받아야만 종속성의 오류가 발생하지 않습니다.
https://pypi.org/project/numpy/#files 에서 파이썬3.9해당하는 Amazon Linux 버전의 .whl 파일을 다운로드 합니다.
# 패키지용 디렉토리로 이동
mkdir python && cd python

# NumPy 다운로드
wget https://files.pythonhosted.org/packages/92/49/127e40f3f468a9bbce1fe69e97d0f0db524621960e0adc51a977298eb49c/numpy-1.23.4-cp39-cp39-manylinux_2_17_x86_64.manylinux2014_x86_64.whl
다운로드 받은 파일은 압축을 풀고, 받은 파일은 삭제합니다.
# 압축 풀기
unzip numpy-1.23.4-cp39-cp39-manylinux_2_17_x86_64.manylinux2014_x86_64.whl

# .whl 파일 삭제
rm -rf numpy-1.23.4-cp39-cp39-manylinux_2_17_x86_64.manylinux2014_x86_64.whl
4.2 패키지 생성하기
상위 폴더로 이동하여 파이썬 패키지로 압축합니다.
zip -r python.zip python/

# 결과
adding: python/ (stored 0%)
adding: python/soupsieve/ (stored 0%)
adding: python/soupsieve/css_match.py (deflated 79%)
adding: python/soupsieve/css_parser.py (deflated 78%)
adding: python/soupsieve/py.typed (stored 0%)
adding: python/soupsieve/util.py (deflated 61%)
(중략)
파이썬 패키지로 압축 시에는 python/라이브러리로 생성되어져야 람다에서 라이브러리를 임포트 할 수 있습니다.
4.3 패키지 업로드
Docker 컨테이너에서 로컬로 패키지를 복사 한 후, Lambda Layer를 생성합니다.
# 컨테이너와 파일의 위치를 :로 구분하고 복사할 곳의 경로를 적습니다.
docker cp con:/root/data.txt /home/dst/
Layer 업로드는 Lambda Layer 공통라이브러리 등록하기 ➔ 에서 확인합니다.
5. Lambda 함수 생성
Lambda 함수에서 호출할 라이브러리에 대한 구성이 마쳤습니다.
이제 간단한 Numpy호출 예제를 활용하여 테스트 해보겠습니다.
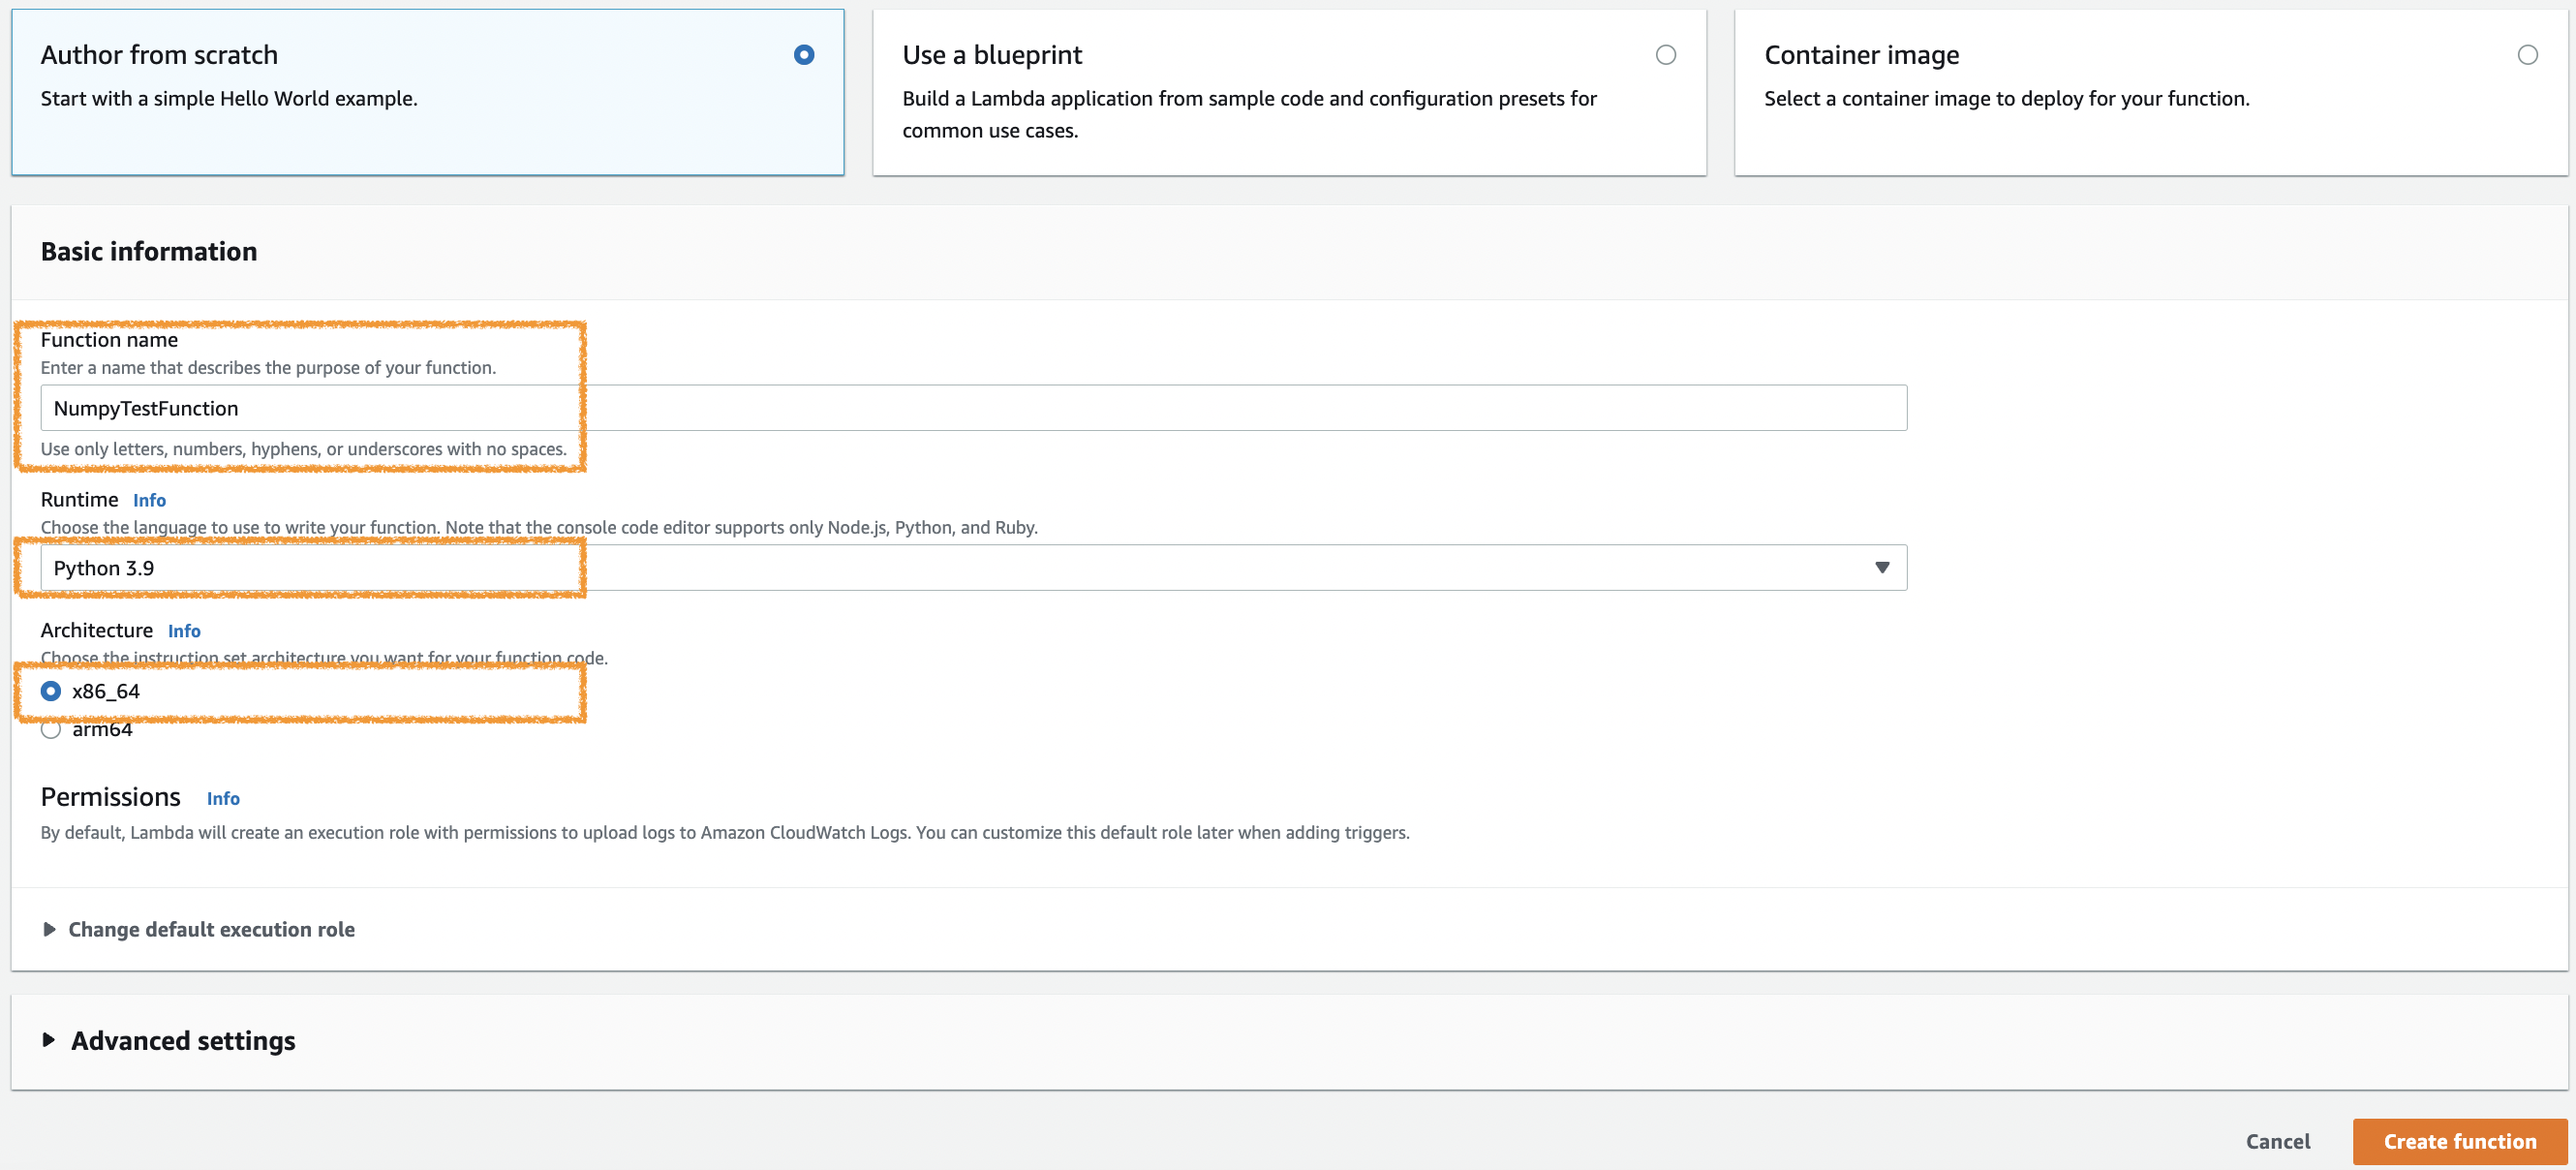
- Function Name : LambdaTestFuction
- Runtime : Python 3.9
- Architecture : x86_64
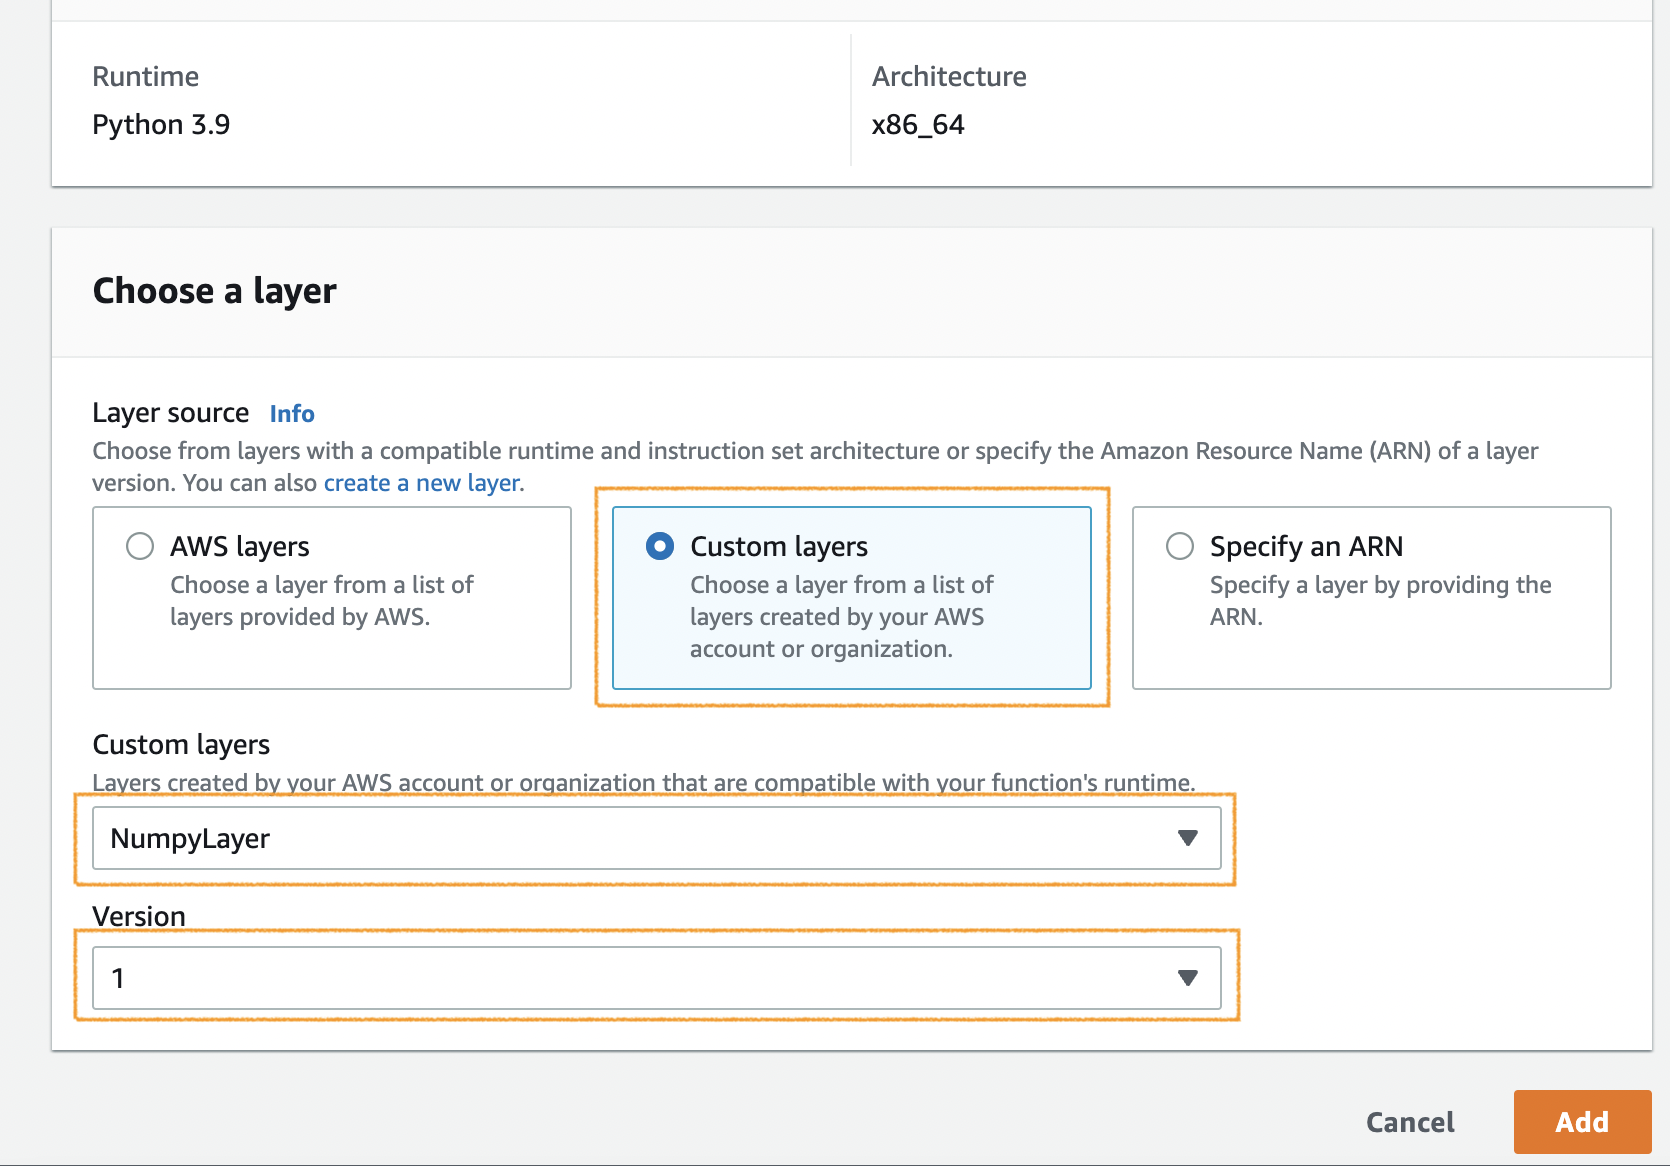
함수를 생성한 후 스크롤을 내려 Add a Layer 버튼을 클릭하고, 만들어둔 레이어를 추가합니다.
샘플 코드를 입력하고 Deploy 버튼을 클릭하고, Test 를 실행합니다.
import json
import numpy as np

def lambda_handler(event, context):

    a = np.arange(6)
    a2 = a[np.newaxis, :]

    # TODO implement
    return {
        'statusCode': 200,
        'body': a2.shape
    }
결과
아래의 return 결과가 나왔으면 정상적으로 임포트가 완료된 것입니다.
Response
{
  "statusCode": 200,
  "body": [
    1,
    6
  ]
}
(중략)
Reference
- https://docs.aws.amazon.com/ko_kr/lambda/latest/dg/configuration-layers.html
- https://devbruce.github.io/aws/aws-10-lambda_layer/#os-%ED%98%B8%ED%99%98-%EC%97%90%EB%9F%AC
- https://sangchul.kr/368
- https://tecadmin.net/install-python-3-9-on-amazon-linux/
- https://sangchul.kr/368
- https://docs.aws.amazon.com/ko_kr/AmazonECR/latest/userguide/amazon_linux_container_image.html
'AWS' 카테고리의 다른 글
| (AWS STS) Python Account Assume Role 임시 자격 증명 (0) | 2024.10.04 |
|---|---|
| Mac OS에서 AWS Cli 설치하기 (0) | 2022.07.22 |
| [AWS] AWS Configure 여러 계정 사용하기 (0) | 2022.03.01 |
| AWS cli로 S3 버킷 다루기(파일 업로드,삭제, 동기화) (0) | 2021.09.04 |
| AWS cli 보안자격증명(aws configure) (0) | 2021.09.04 |